|
|
|
|
When shooting panoramas there are many factors you need to consider, all equally important.

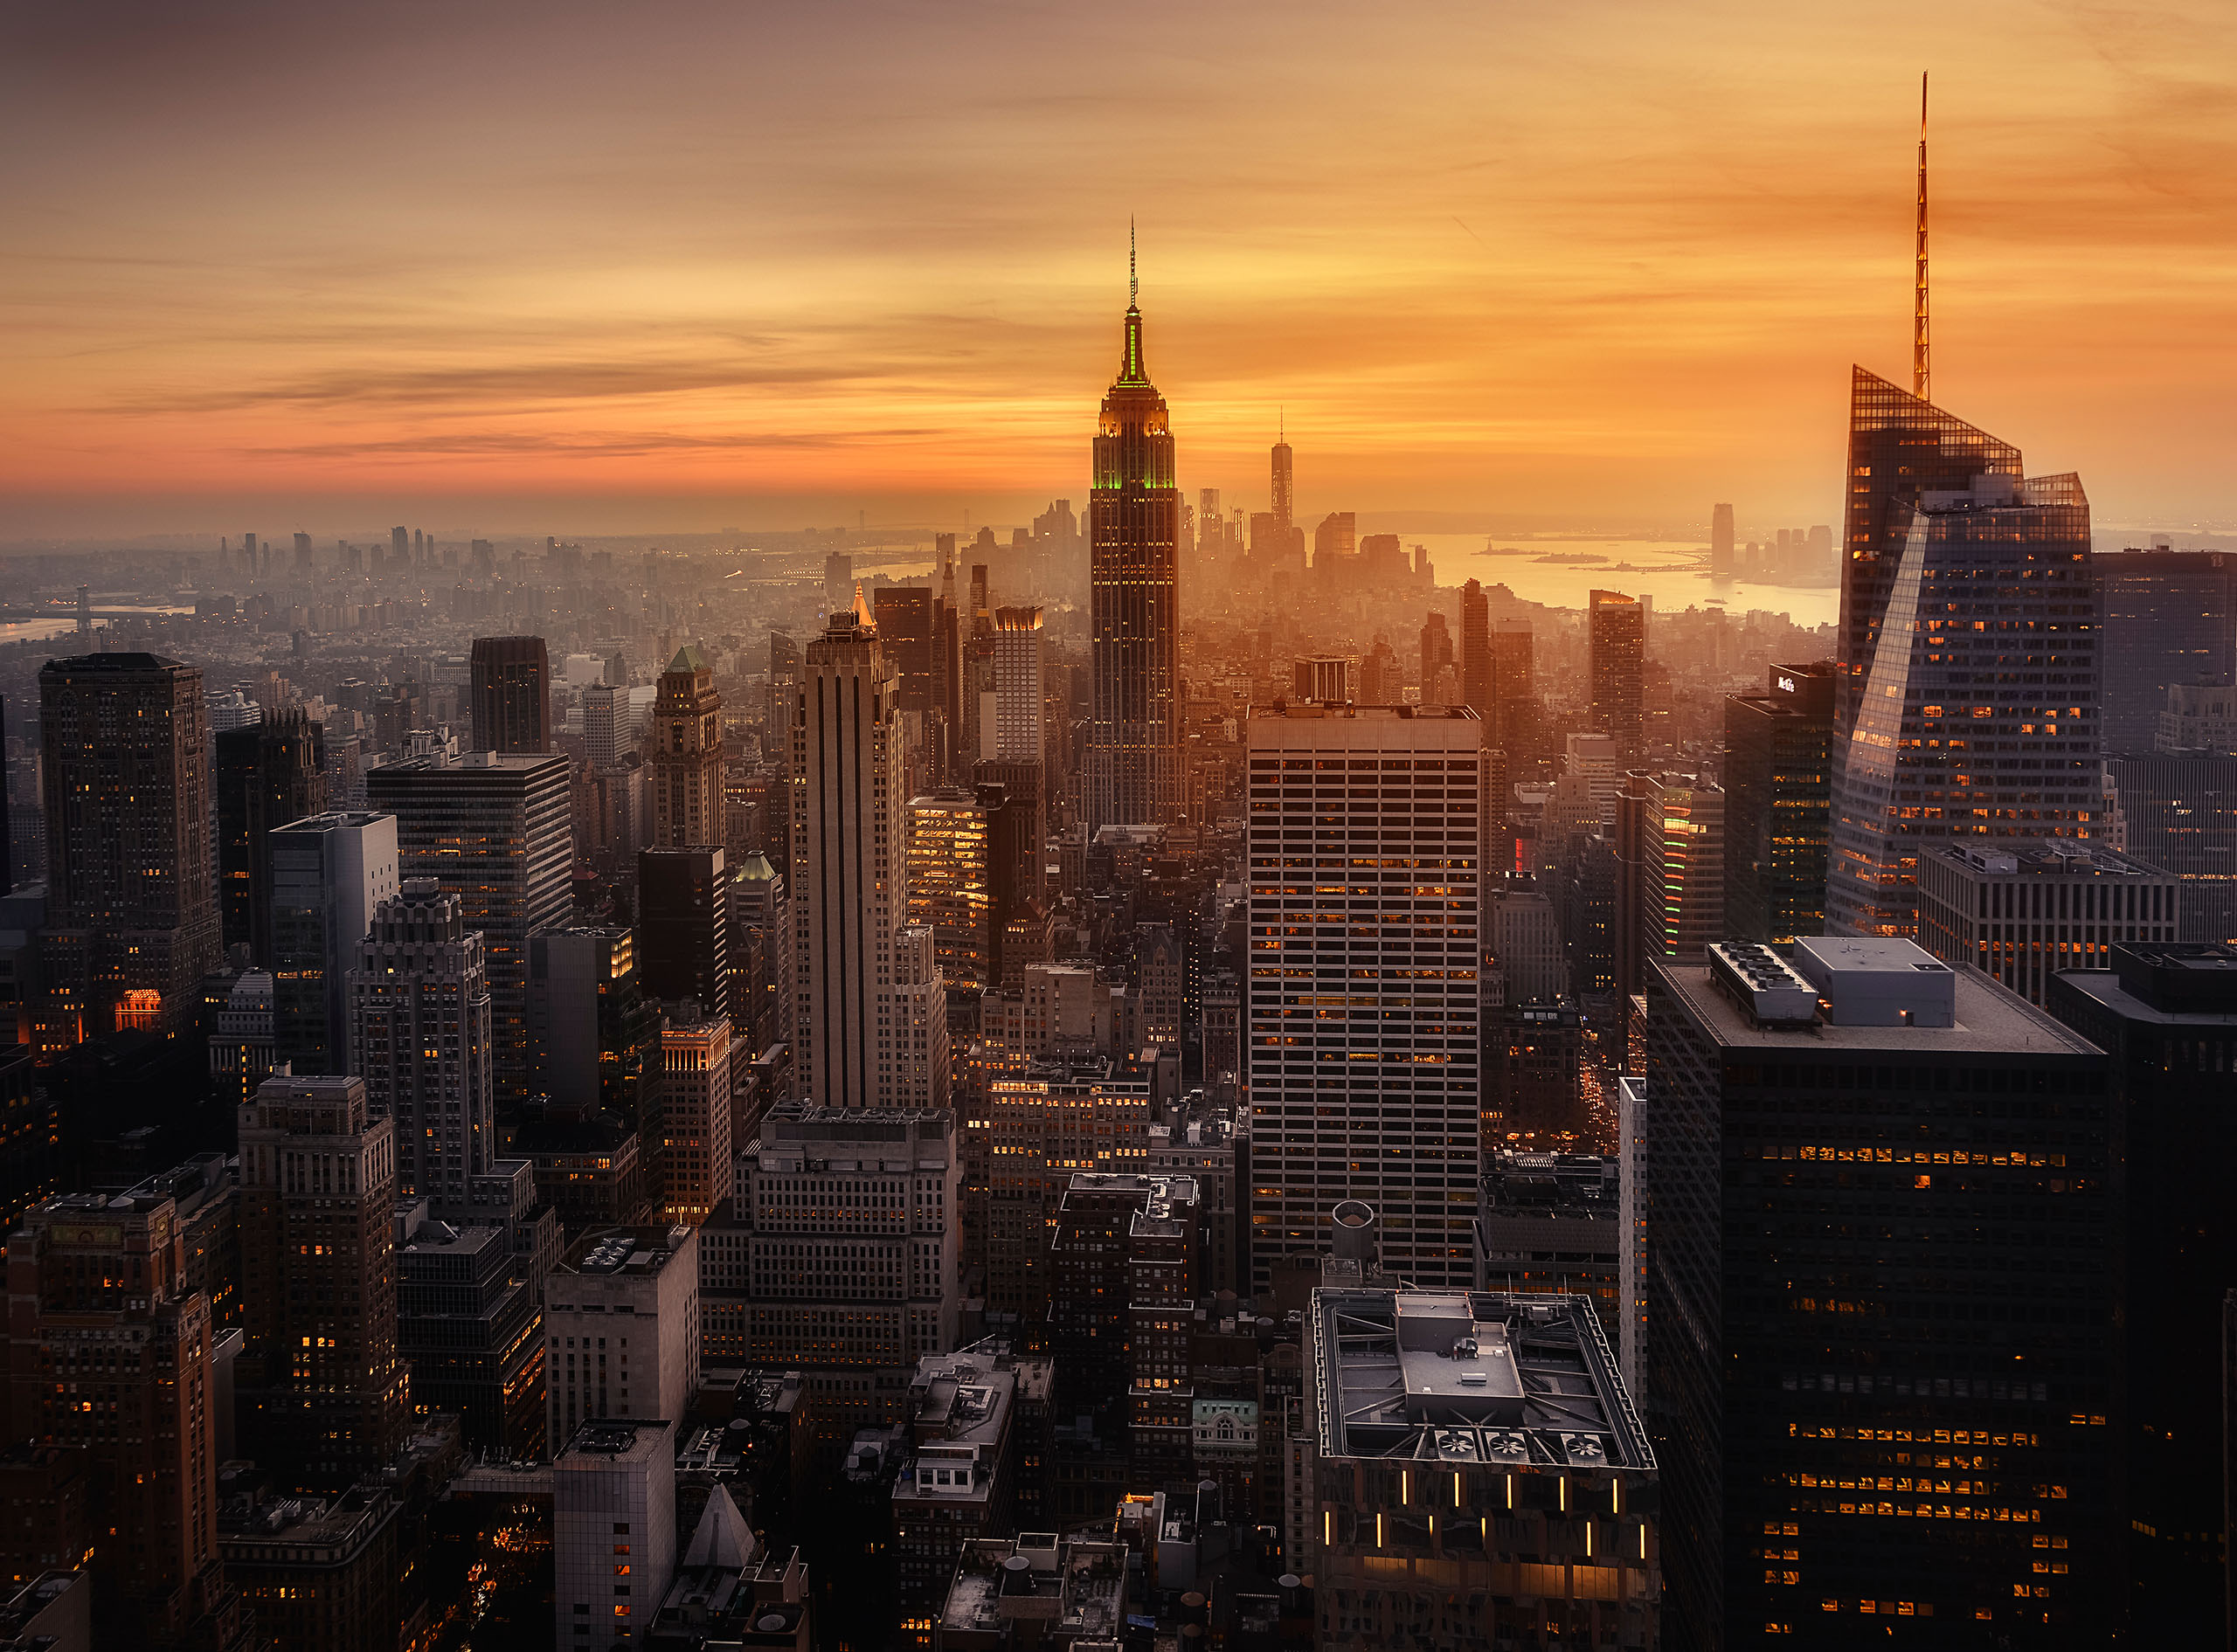
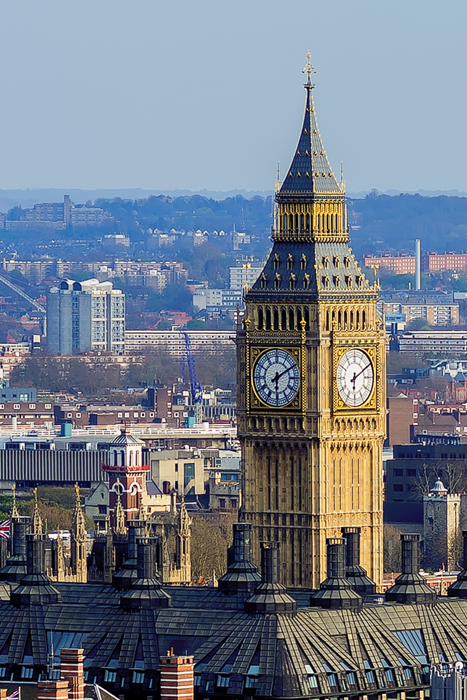
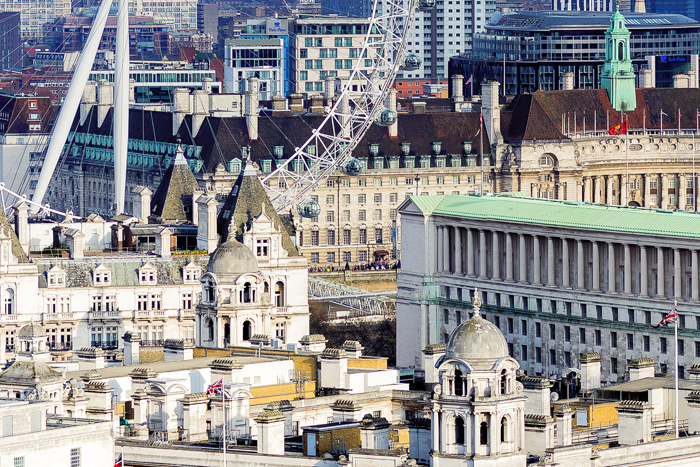
This was shot using the Pentax K5 (silver edition) and the SMC Pentax-FA 77mm F1.8 Limited from the penthouse balcony of The New Zealand High Commission in London.
First, the composition.
What are we shooting?
Where will the composition start and end?
Usually panoramas are horizontal in composition, but they can be also vertical. Panoramas can also consist of many rows of images or many columns. They can be made from 2 images, or as in this case here from 160 images.
For a panorama of this nature, a sturdy base is essential, an absolute must. So invest in a good solid tripod. Both vertical and horizontal rotation was used to create images. So ideally you will have a gimbal head on your tripod to insure accurate central rotation in the centre of the sensor for stitching the images later together and avoiding hard to correct errors.
For the exposure, as with most of my photography, my technique is simple. Spot meter and find the brightest and darkest point for the scene. This gives us the dynamic range. From here we can calibrate for an exposure, and determine if bracketing is needed. As I wanted to render detail in as many of the windows in the view, I decided that I would over-compensate the bracketing requirements and shot -4ev, -2ev, N-ev, +2ev and +4ev. I set up the correct exposure and bracketing options using Manual Mode.
White balance is incredibly important when shooting images that need to be stitched together. It is advised that you select a manual white balance for all shots for consistency of colour temperature. I used “cloudy” for all the exposures.
The reason we must use manual settings for exposure and white balance is needed to create one giant exposure, and in order for it to look natural when completed and stitched every aspect of the exposures must be 100% consistent. If choosing just “auto” expose for each section and auto white balance for each section, then these separate images will have different colour and incandescent values, which will result in a very patchy panoramic image once stitched together.
Now that we have set our exposure and white balance, we must shoot the image. We must be careful as we rotate the camera to ensure overlap of each individual image, the more overlap the better. I usually aim to have about a third to half overlap on each image. This ensures accurate stitching later.
While shooting this, I kept an eye on the Millennium Wheel, it’s a large part of the image, and it moves. To ensure accurate joining of all its parts in stitching and no ghosting as I merge exposures later. I waited for it to stop rotating while passengers alighted and timed the gap until it started moving again. This gave me a window of opportunity to ensure that I can shoot it and process it simply later. Once we are satisfied with the composition and have all the shots needed (including some extra around the edges so that we can make a nice crop) it’s time to process the images.
First we need to create a folder for all our images and import that into Lightroom. We apply lens corrections to one image, and reduce the default sharpening to zero, we then select all images and sync only these adjustments across all images. As each section was bracketed we have 2 darker images, a normal image, and 2 bright images, these are grouped and then converted into 32bit .tiff files. These new .tiff files were then selected and opened in PSCS5 for panorama in auto mode with ‘correct geometric distortion’ selected.
Depending on the capacity of your computer, this can take a long time; so put the kettle on.
Once Photoshop has aligned and joined all the images you should have the beginnings of a panoramic image. This image was flattened and returned to Lightroom for contrast, exposure adjustments and white balancing to create a natural looking image, then opened up again in PSCS5 where layers and masks were used with individually brighter exposures to ensure details in windows in the nearer buildings, as well as other shadow detail retention, also some of the darker exposures were needed for some highlight detail retention, using a similar method. Color FX Pro 4 plug in was used for some contrast adjustments, as well as colour balance using Viveza 2, then the image was cropped.
The end result is a 180 mega pixel image that can print well over 8 meters wide. I have included some blow ups of sections of the image to give you an idea of the scale of the final image.

Please check it out on the gigapan website where you can pop it out into full screen, zoom right in and pan around the image.
 | Write |
 | Mohammad Soheilinia What can be seen in this series of photos, important locations of London and modern buildings in the traditional context of tissue that is very nice and pleasant,
Thank you for a free junket to the center of England is also free and safe. |