by Javier Senosiain
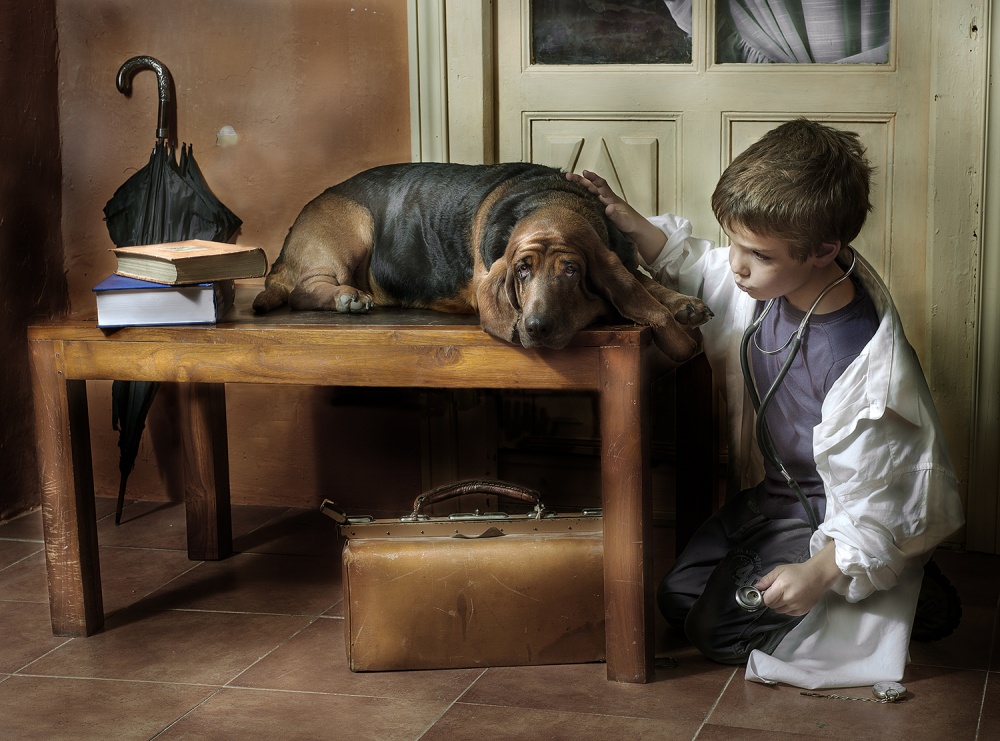
The concept was in my head for months. I had all of the props, the location and even the perfect little model to portray the veterinarian — it's great when your own son is willing to play the part. But there was a very important piece missing: I needed the perfect patient to complete the puzzle.
"Marco and Lola" by Javier Senosiain
I'd had this idea in mind for a long time. Already available to me were the old doctor's bag, the umbrella, the stethoscope and the pocket watch. Initially the idea was a scene about medicine. But I love working with animals, and I take a lot of photographs of pets in my studio, so the idea gradually transformed into one about animal medicine.
I had the location — a room in my house (which is quite old) with an antique door. I had the props. I had the human model (my son) who is at a perfect age to take pictures and he enjoys it. But I was missing one of the main characters — the animal. I could not find a suitable animal to be the patient. Several months passed, and I still was not able to complete the scene since the most important part was missing.
"And best of all was that sad expression of the basset hound, which would be a perfect addition to the photo."
An opportunity arose to meet Lola, the dog of a friend. Lola is an incredible character. I asked the owner to let me take a photograph of him with Lola, and after having worked with the dog for over an hour, I remembered my old idea about animal medicine. The dog was perfect. She was extremely obedient. And best of all was that sad expression of the basset hound, which would be a perfect addition to the photo.The session hardly lasted half an hour; everything worked perfectly. I dressed my son in a white shirt serving as a medical lab coat, and I arranged all the other elements of the picture, with special emphasis on those related to medicine. I set up the entire scene in a small room in my house, just in front of the old door.I like to light a scene to give the appearance of natural light coming through a window, with marked contrasts of light and shadows. I positioned a Walimex Pro VC-300 Studio Flash with a white umbrella three feet (one meter) to the left of the camera, and about seven feet (two meters) away from the scene at a height of five feet (1.5 meters). I used a white cardboard reflector to the right of the scene to help fill in the shadows.
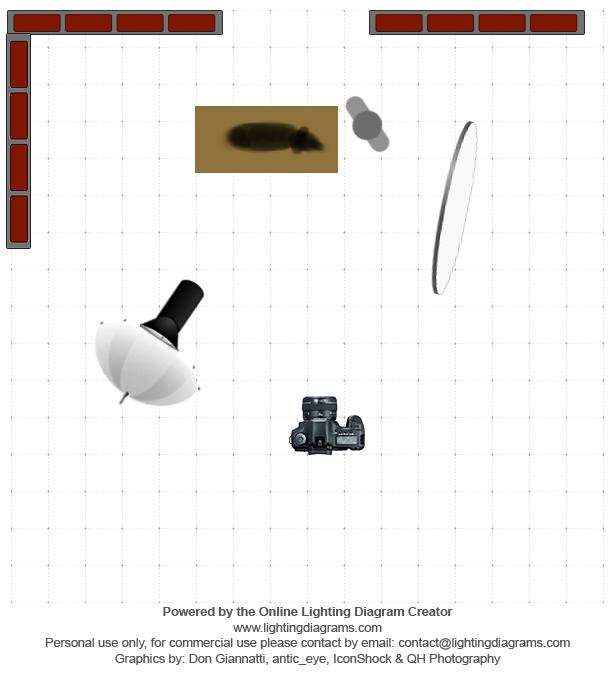
Set up diagram
" I do not use a tripod when working with animals and children because I am forced to keep moving."
I positioned myself with the camera about two feet (60 cm) above the ground. I wanted to be on the same level as the child and dog. I do not use a tripod when working with animals and children because I am forced to keep moving. I took about 15 pictures with the camera's shutter speed set to 1/200 second, aperture to f/8 and ISO 400.The light meter indicated an aperture of f/11, but I always overexpose by one stop in order to capture more information in the image file. This helps tremendously when I work on the lights and shadows in the final image processing, and it prevents excessive noise.
The image was processed in Adobe Camera Raw and Photoshop CS6. I also used Nik Silver Efex Pro 2 plugin. In my processing, I use a Wacom tablet to better control my Photoshop Brushes.This is the original image.
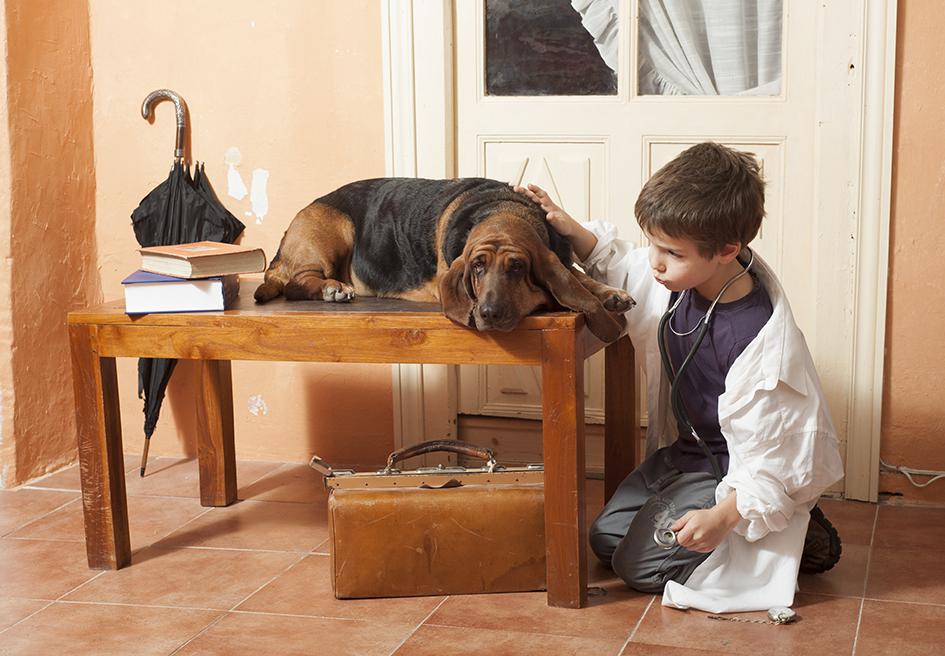
Original RAW
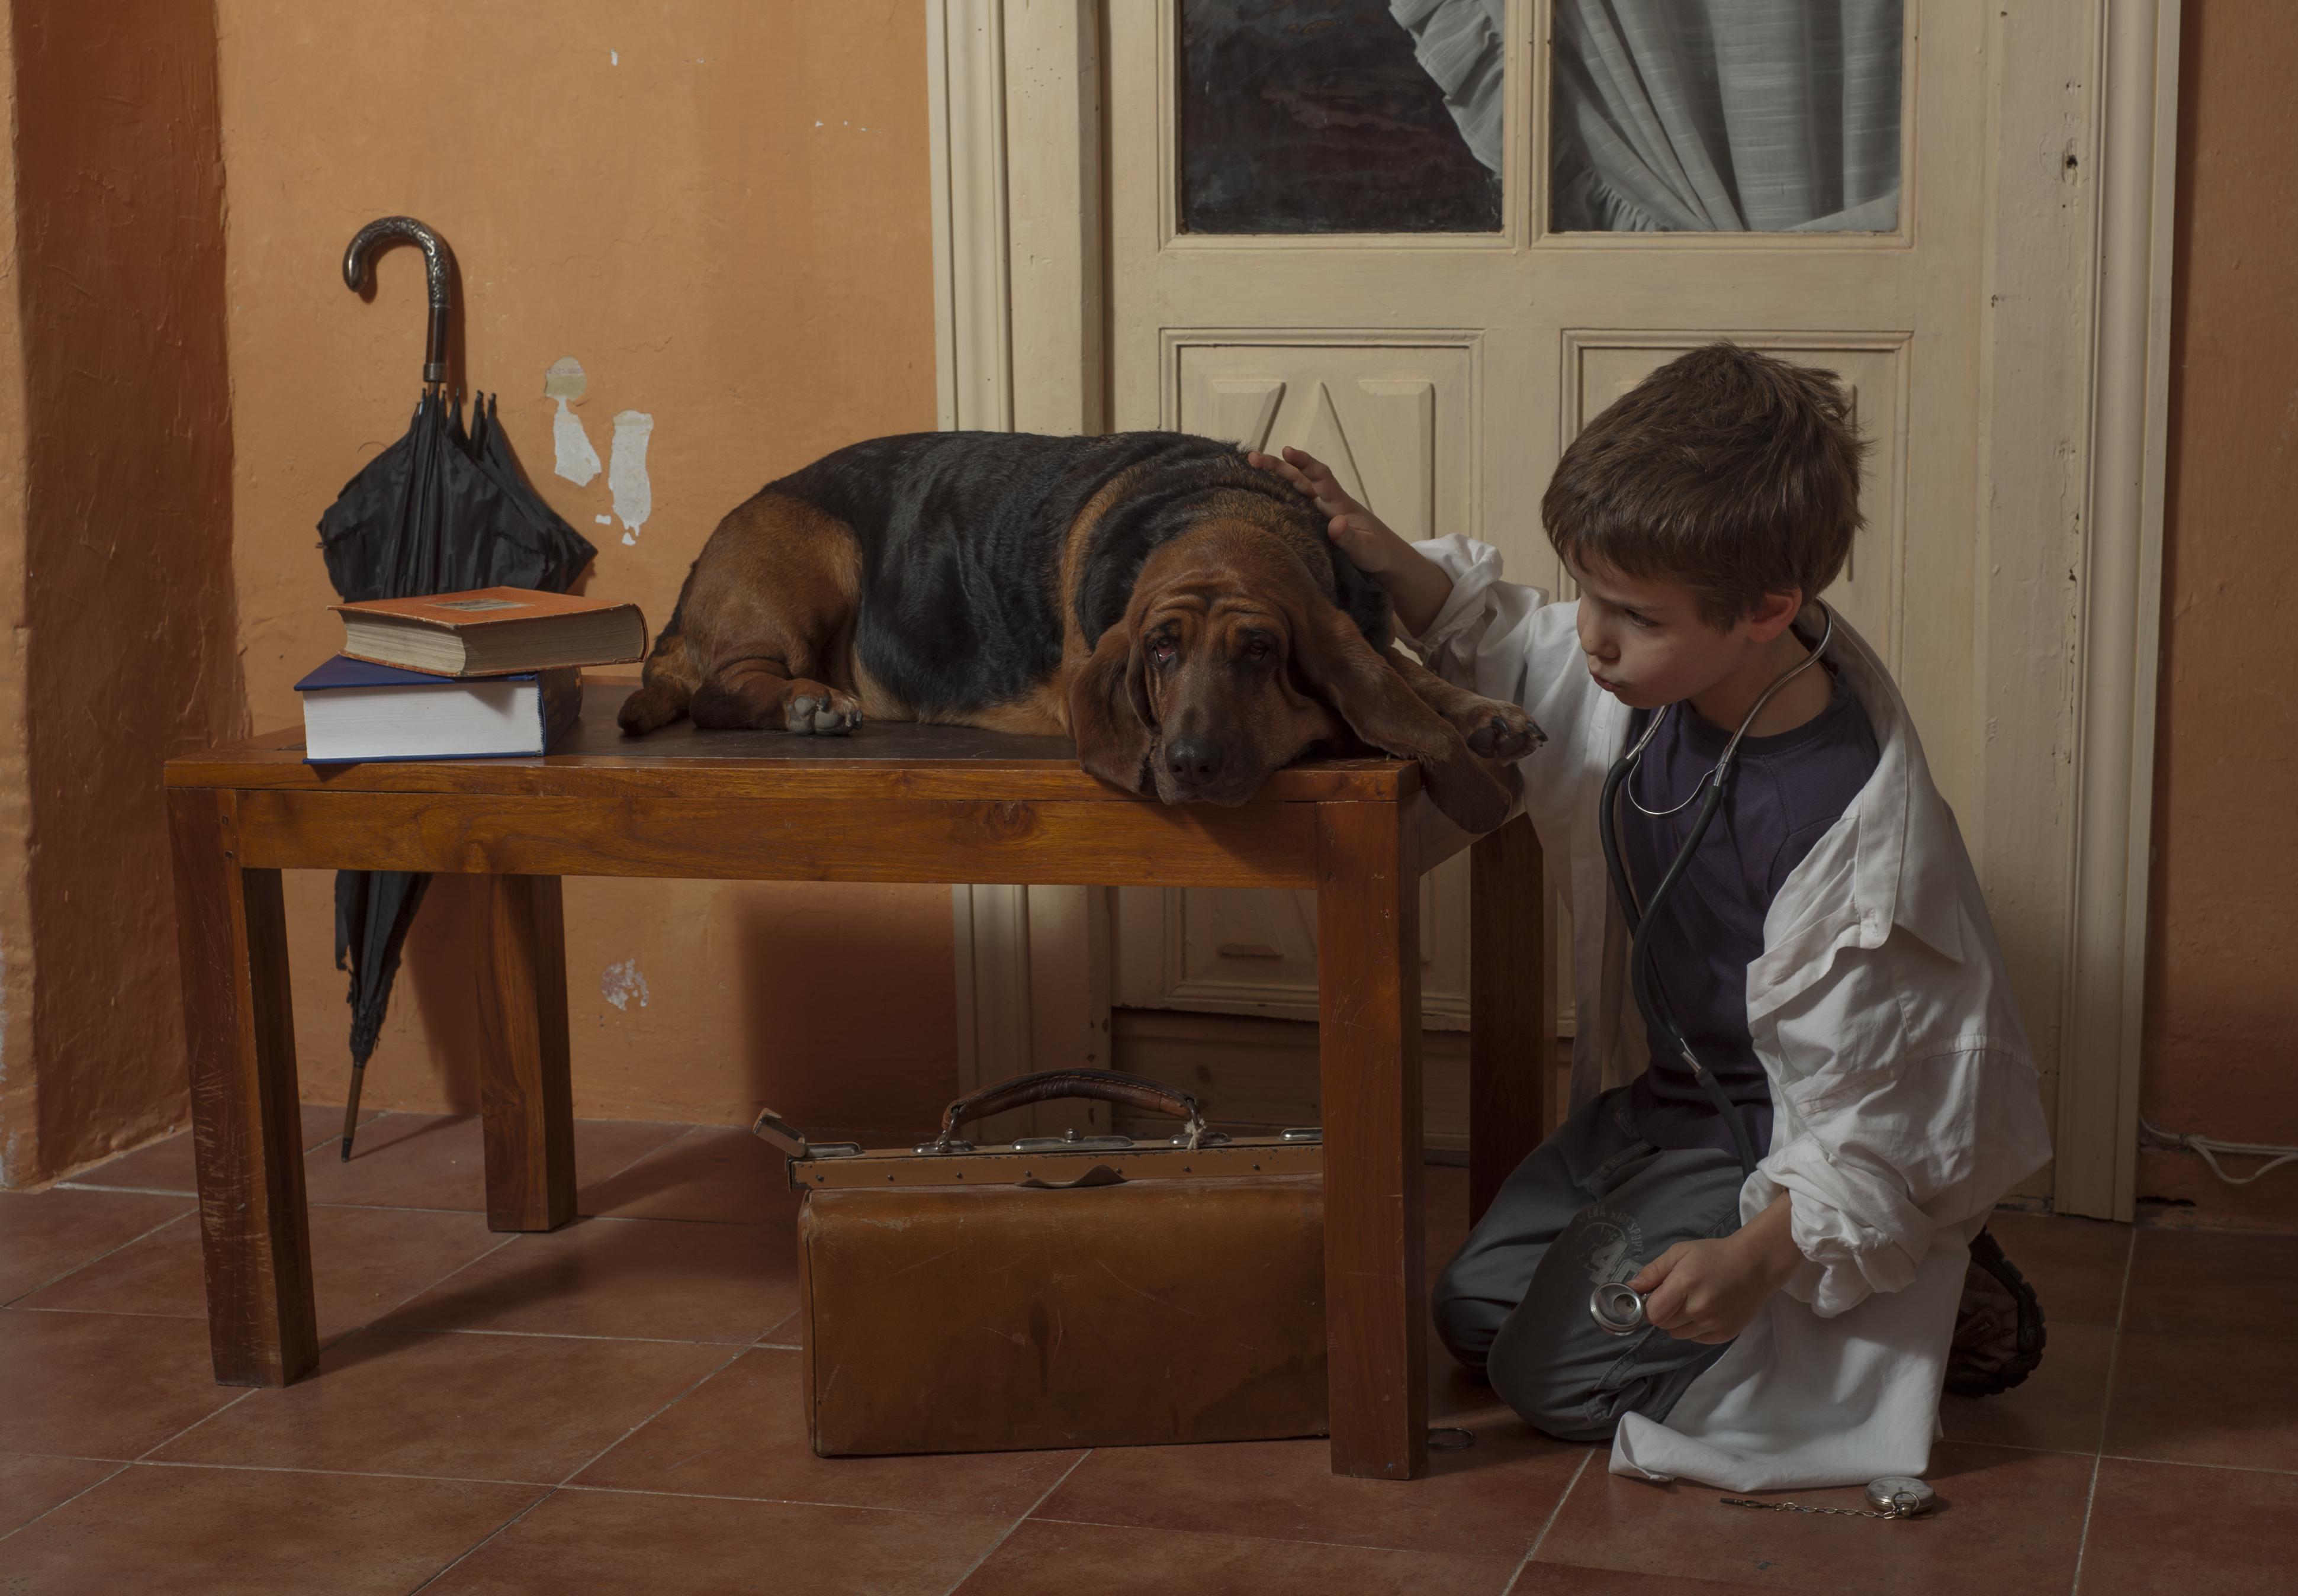
Initial edited results
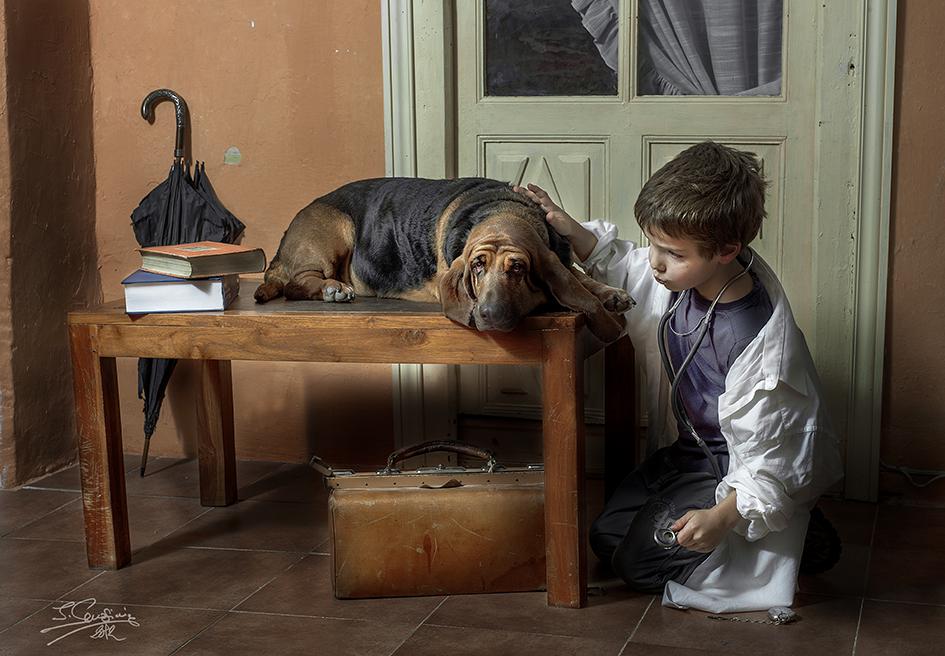
Final result
1) Look for harmony in the color scheme. The wall, dog, floor and door are all within a similar range of warm colors.
2) Use a single light source to emulate daylight coming through a window.
3) Find models that suit your concept. The basset hound's typical sad or weary expression was perfect to convey either an ambiguous feeling of the dog patiently tolerating the child's play, or actually playing the role of a veterinary patient.
I am from Spain. I studied photography at the Faculty of Fine Arts of Universidad Complutense de Madrid. I dedicated many years to professional photography in the analog era. After a lapse of inactivity in the field, I returned to the professional world with my photography studio SilversaltPhoto. I must say that the digital age and the new technologies have managed to renew my desire to do creative photography. I enjoy working with and for the image. My main goal in photography is to capture images with great aesthetic beauty.