|
|
|
|
by Zachar Rise
Published the 23rd of July 2020
Initially, I shot this photo as a demonstration to show how to take a shallow depth of field portrait using studio lights. I like portraits with very shallow depth of field, when only the eyes are in focus and the rest is blurred. Such a portrait has its own special charm.
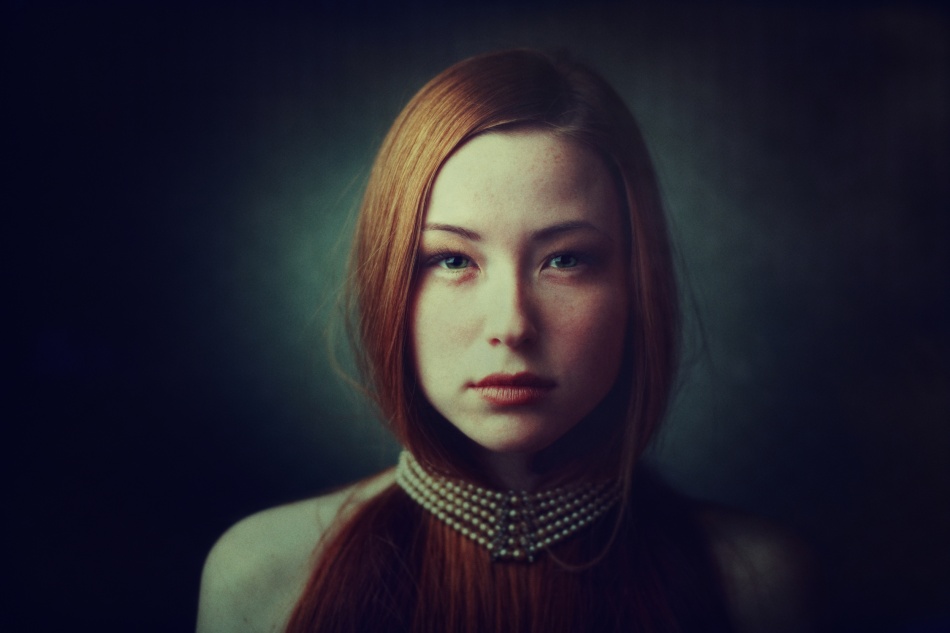
Canon 5D Mark II . Canon 50mm f/1.8 . f/1.8
This image was taken during my workshop. The model is Valeria Gurevich. People who follow my pictures on websites and social networks frequently ask me questions about how I make my photos: What is my lighting setup? What equipment do I use? How do I process my photos? Unfortunately, I wasn’t able to provide comprehensive answers to everyone. Eventually, I decided to start conducting workshops for small groups of people so everyone would get a chance to see the complete process from start to finish — beginning with the camera settings and lighting setup, working with the model and finalizing the work by showing how I process the RAW files in Photoshop. This tutorial will teach you each of the steps. This portrait of Valeria is the outcome of such a workshop. Personally I like it a lot.
"However, it’s usually problematic to use a large aperture with studio lights because, in many cases, even setting the studio flash on its lowest power will create an overbright image."
The depth of field is mainly affected by the aperture selected, and in order to have a very shallow depth of field, the aperture has to be large, meaning wide open. However, it’s usually problematic to use a large aperture with studio lights because, in many cases, even setting the studio flash on its lowest power will create an overbright image. To resolve this issue, I use a Neutral Density filter since it blocks out a good amount of light. So for this shot, I used an NDx8 filter attached to my lens. The 8x means that I have reduced the amount of light by 3 stops. (Just for the record, a 4x filter is 2 stops and 2x is 1 stop.)
The lighting was pretty classic: a softbox on the left side positioned above the model, a gold reflector on the right side to bounce some light into the shadows, and a snoot attached to a light aimed at a dark gray background to create a circle of light behind the model.
The model has great red hair, and I decided to accentuate her beautiful hair, and at the same time make the portrait unusual, by wrapping a pearl necklace around her hair.
"When shooting with shallow depth of field, an additional challenge is getting the eyes in focus. The tiniest mistake in focus will destroy the image because the model's eyes will be soft."
I took about twenty shots to make sure I had at least one good one from a technical standpoint. When shooting with shallow depth of field, an additional challenge is getting the eyes in focus. The tiniest mistake in focus will destroy the image because the model's eyes will be soft. It is an absolute no-no in portraiture photography to not have tack sharp eyes. The best practice here is to focus on a point close to the eye, and then to not change the camera position after the focus is locked.
I was very satisfied with the result — it even exceeded my expectations. I think the expression and colors are very good.
POST PROCESSING
I used Adobe Camera Raw, Photoshop CS5, Nik Color Efex Pro 3.0 plugin and Tiffen Dfx v3 plugin to process the image.
1) I opened the RAW file using Photoshop's built-in Camera Raw software and applied all of the default settings.
2) I exported the image to Photoshop, and then straightened and cropped it with the Crop tool to create the ideal framing.
3) Then I performed a slight skin cleaning using the Spot Healing Brush tool.
4) The next step was to enhance the colors and correct the contrast. I did both using Nik Color Efex Pro 3.0 and Tiffen Dfx v3 plugins. I do not have a specific recipe or workflow when I use these plugins. Each time I just play with the various presets, and then make additional, manual fine-tuning adjustments to the presets I select until the colors of the image appeal to me. I almost never seek for exact color reproduction or exact white balance, but I try to make colors vivid and harmonious.
TIPS
1) When adjusting the positions of the strobes, be accurate and precise.
2) Use the black and white preview preset in your camera to view your images on the LCD. It will give you a better idea of your lighting, highlights and shadow and contrast in the image than the color preview will.
2) It’s very important to have good communication with the model during the shoot. Explain what the desired position is, and correct the model's pose if you need to. Remember that if your model is comfortable, relaxed and understands the overall concept of the shoot, then the photos will be much more successful.
3) During the post-processing, make all the major adjustments using layers and Layer Masks. That way you have the ability to go back and correct any adjustments you made along the way.
BIOGRAPHY
I am an amateur photographer from Israel. Photography has been a hobby for me many years. I enjoy portraiture and fine art nude photography most of all.
 | Write |
 | Vladimir Asriyan A wonderful portrait !!! Detailed step-by-step description of both the shooting process and photo editing. Expressed in such a simple and understandable language that all questions disappear by themselves. Thank you very much Zakhar !!! Many thanks to Yvette for a wish to more often provide the authors with the opportunity to talk about their work. One such review is sometimes more useful than viewing many photos... |